Showing posts with label sewing. Show all posts

Friday, November 8, 2013

Stacked Washer & Dryer Tutorial


I made this a few years ago, but am just now getting around to posting the tutorial. My daughter had one of those plastic washer/dryer things to play with, but it was not functional and took up a lot of room. I created this one with the intention of using it as a laundry basket as well. You could put a mesh bag on the inside for laundry if you chose to use it that way.
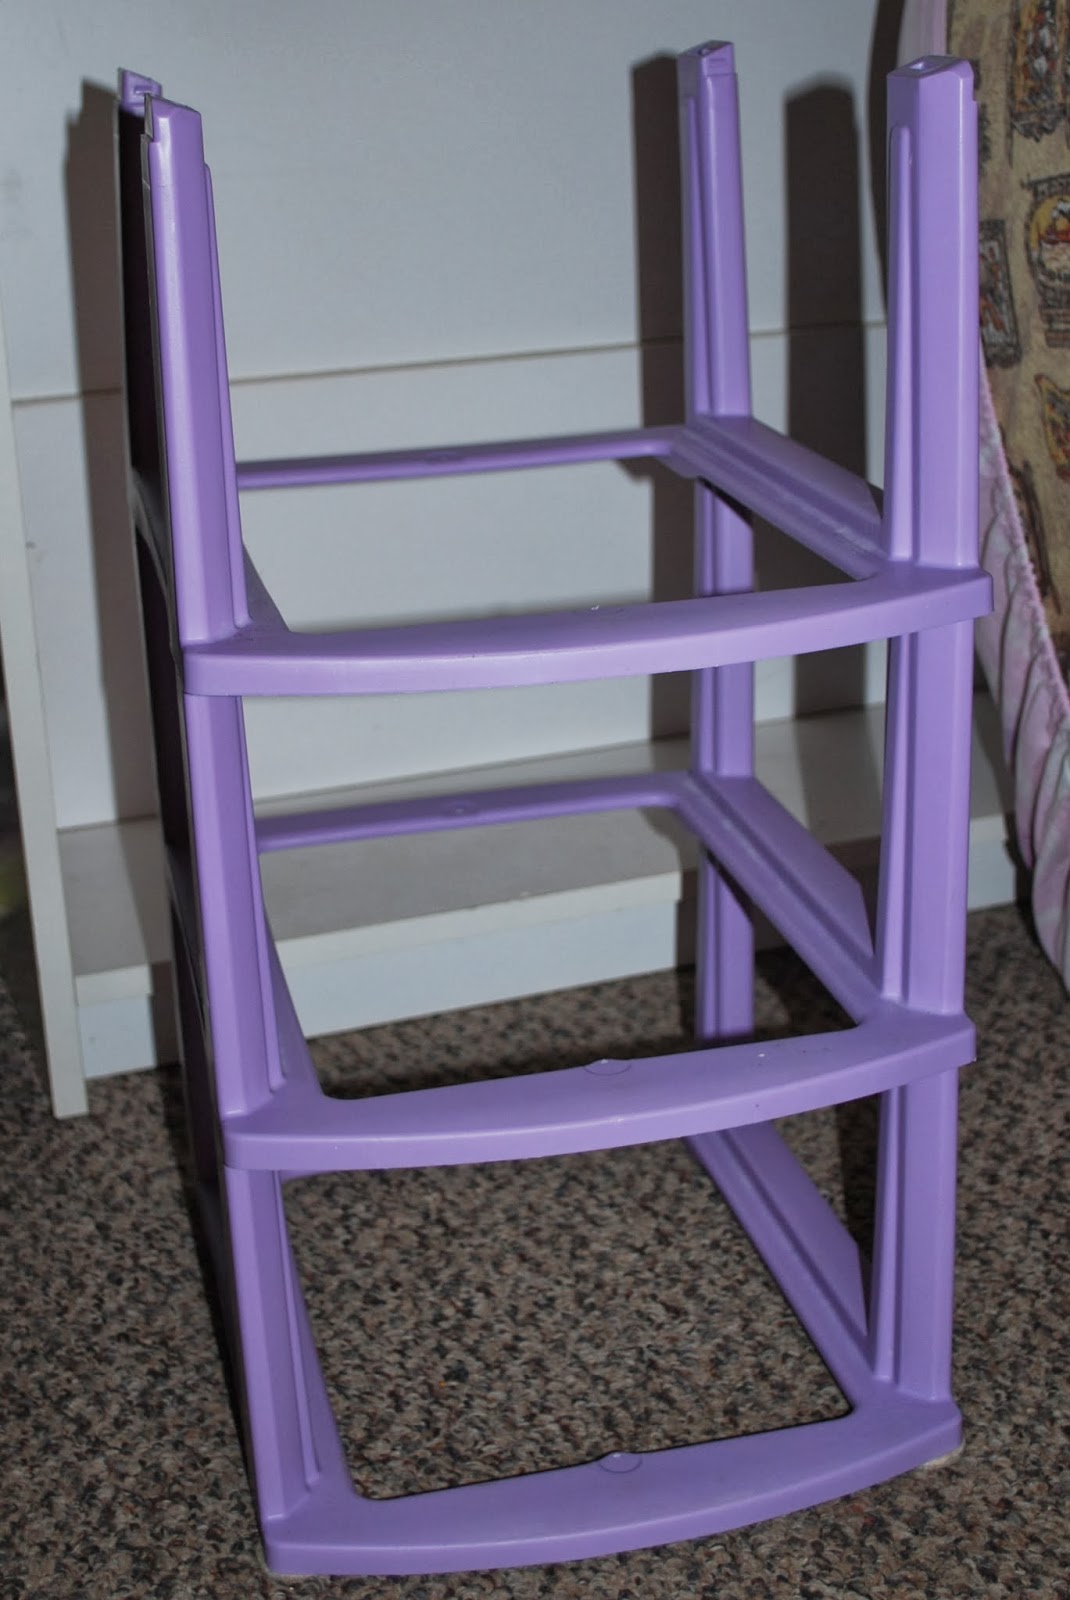

I started with this...one of those 3-drawer plastic things...minus the drawers. You could also use PVC pipe to build a simple frame.


I cut my fabric to fit the frame--plus a couple of inches for seam allowance and sliding on and off if needed.


I traced circles onto my main body fabric, showing where I wanted the holes to be.


Folded the material so that the circle was folded in half, and then cut out my circles...I cut a little bigger than my drawn lines.


Next, I cut 4 inch strips to make "bias" tape from...though I didn't cut on the bias.


Next, using your "hole circle" as a guide, cut four circles the size you want to cover the hole with (the door)...I made mine about an inch larger all the way around.


Cut your batting to match the "door" size.


Sandwich your batting between the front and back pieces of your door, and pin in place.


Sew a two short tubes for handles.


And stuff with the scrap pieces you cut off (or use poly-fil).


Quilt your batting and door covers in place.


Attach handles.


Iron bias tape pieces.


Make bias tape.


You will want four pieces of bias tape, one for each hole, and one for each door.


Pin bias tape in place,


And sew it to your hole.


Sew bias tape around your door as well.


Add the hinge to your door,


and attach to the face of your washer/dryer combo. (I mounted my doors to where they would close by gravity and I would not have to have velcro or anything to hold them closed, but it could be done either way.

Next, sew the other three sides on, creating a tube, and sew a square on for the top.


Here is what the finished product looked like. She absolutely loved it! I think in retrospect I would use a PVC pipe frame so that I could make it the size I wanted, but it worked very well this way, and I recycled my plastic thing with missing drawers.

I would love to know if you tried this tutorial, and how it worked out for you. (I assumed in the tutorial basic sewing skills...if you have any questions, feel free to ask).


Check out my link party page to see where I am linking.

Thursday, October 31, 2013

Ariel Dress Tutorial


Now that Halloween is over with, maybe I can get this post finished. A week or so ago I posted a teaser pic of Munchkin in her Ariel Costume, and promised a tutorial, so here it is.


I started with an extra large pink t-shirt and half of a twin sized (I think) sheet.


 The t-shirt got pinned and sewn together in the front and back (this t-shirt had a logo on it which meant I didn't get to choose where to sew to take the body of the dress in some.)


(She is wearing pink long-sleeves under the t-shirt).


 I didn't really take pictures of the skirt-making process, but essentially, I just added a piece of elastic in  the center (long-wise) of a piece of sheet, so that an equal amount hangs on the inside and outside...I did this both to make the skirt a little fuller and to help with the sheer aspect. I actually also sewed a tube into the middle of the skirt that you could stuff with Wal-Mart bags or something to give the skirt even more fullness.


Here, you can see that the skirt is actually separate from the top. I chose to make it this way so we could change things up some if we wanted to, and she could wear the skirt with something else.

I also put elastic in the sleeves...I was in a hurry, so I cheated a bit. I just cut a slit in the sleeve hem and threaded elastic through, then cut another slit (because of the seam) and sewed the ends together. So, if you turn the sleeve inside out, you can see part of the elastic, but I am not worried about that for a costume. If this was for daily wear, I would have done the elastic properly just for comfort.


To ruffle the front of the t-shirt, I just accordian-folded the fabric in the middle until it was the right length and put a few stitches to hold it in place, which allowed the edges to drape down nicely like Ariel's dress does.

Here she is after we sprayed her hair with red hairspray. This was after the party, so the hairspray is already wearing off.

And a beautiful Ariel pose for the camera!
And there you have it!  I'm sorry I didn't take more step-by-step pictures. Unfortunately, with a 2-month old, I was interrupted often and forgot that I hadn't already taken pictures of the step I was on. Let me know if anything is unclear, and I will do my best to clear it up. Thanks for stopping by!


Check out my link party page to see where I am linking.

Friday, September 24, 2010

Hooray for sock creatures!

So...I made some sock creatures tonight (used real socks this time). Strangely enough, the "easy" patterns were the hardest for me to do. The bunny was my favorite...I will definitely be making more of him.

My adorable little bunny!

Side view so you can see his/her ears.

Squarish turtle.

Strange (but cute) fish.

Well, that's it for my creativity tonight. I'm completely out of ideas...for now. I think I will go put some of my rag rug material in a bag for tomorrow. I'm supposed to make an appearance at a 1st birthday party for a friend's baby, so a rag rug will give me something to do (especially since my hubby volunteered to show up early to help grill).

Wednesday, September 8, 2010

Boy am I tired!

I stayed up way too late last night (studying mostly) and had a really long day at school today. Wednesdays are the worst for me because I am gone from home for 14 hours (my school is an hour drive each way). The long day is just the price I pay for only having to go to school 2 days per week, but believe me...it can take its toll. I had 2 tests today. The first was in my Anatomy and Physiology lab...I think I did pretty well, but I did spend alot of time studying, so I will be very disappointed if I didn't. The other test was in my computer class. It was graded automatically when submitted (by computer) so I know I did well on it. It would be nice to not have to wait to find out how I did. I have an english paper from two weeks ago I still haven't gotten back...and another due in a week so I really wanna see my other one so I don't make the same mistakes again.

So, atleast until my schedule changes, Wednesdays aren't going to be productive for me to create something...unless I take something with me to school that I can sew by hand. I wonder if I could sew or crochet or something in class. I would be scared to ask though, and in a way I see it as rude...even though I can pay as good or better attention to the lecture when I have something to occupy my hands. I do have several breaks between classes though, so if I could take something to work on, that might work nicely. In the next few days I think, I will be getting materials set aside for my next few projects, and really trying to work on something each day.