Showing posts with label repurpose. Show all posts

Friday, November 8, 2013

Stacked Washer & Dryer Tutorial


I made this a few years ago, but am just now getting around to posting the tutorial. My daughter had one of those plastic washer/dryer things to play with, but it was not functional and took up a lot of room. I created this one with the intention of using it as a laundry basket as well. You could put a mesh bag on the inside for laundry if you chose to use it that way.
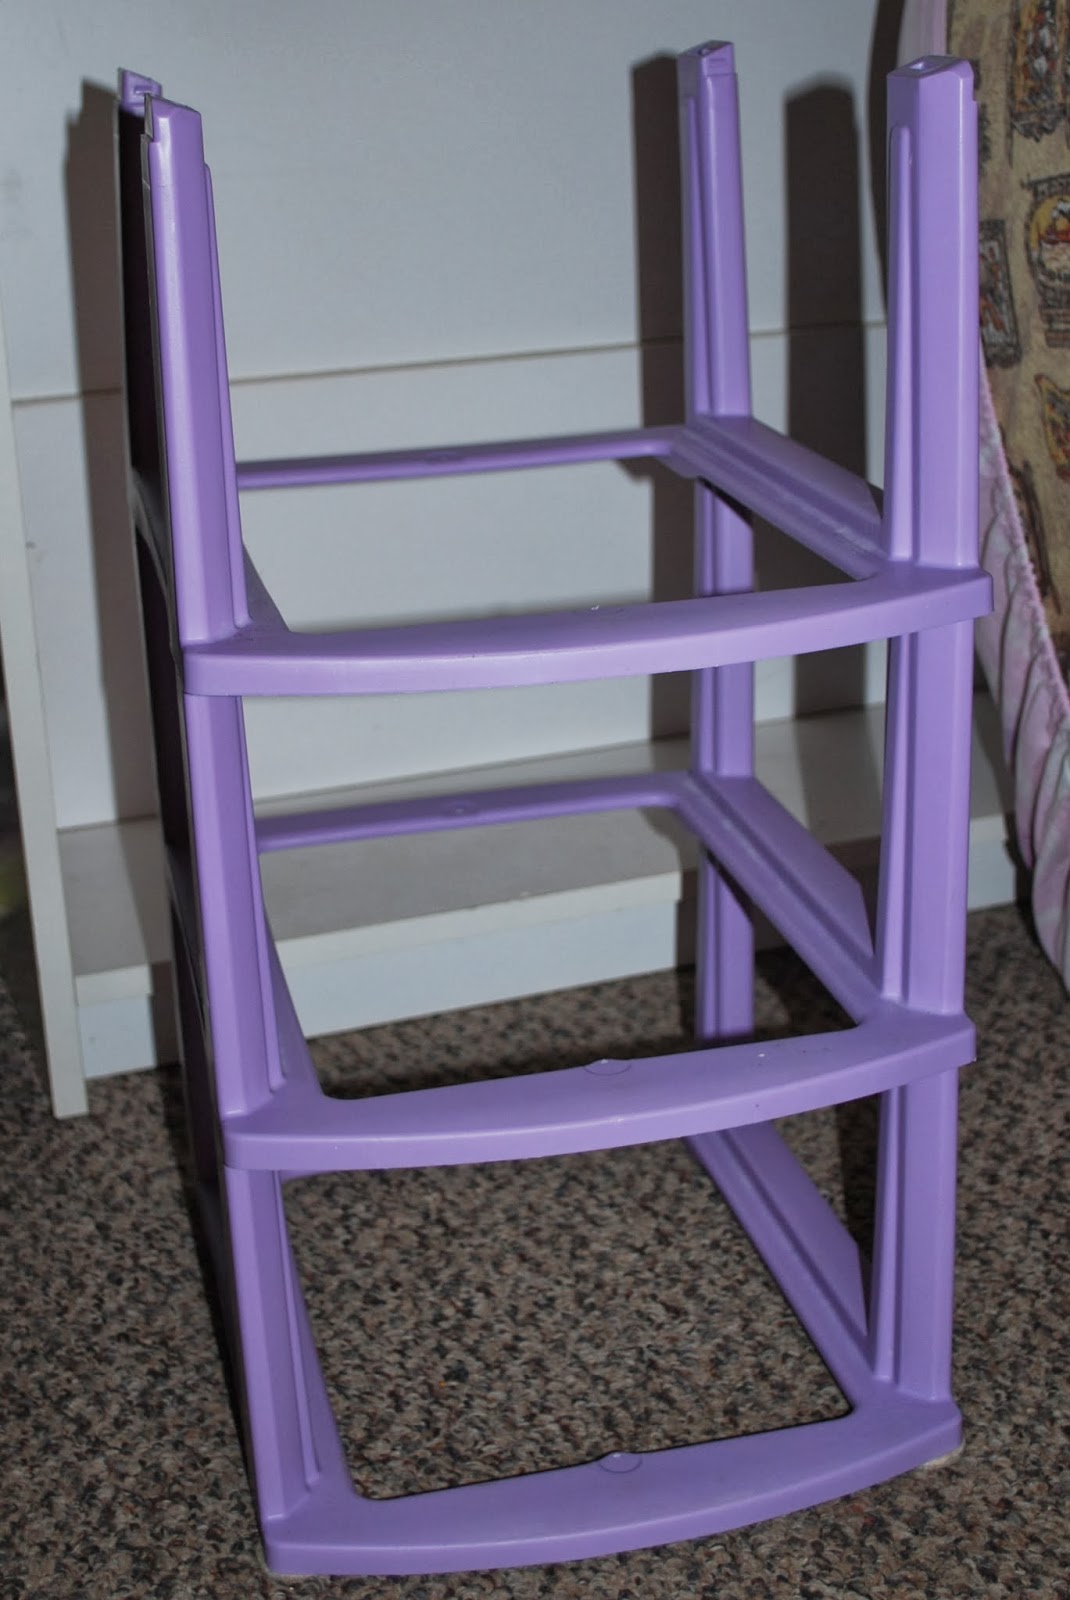

I started with this...one of those 3-drawer plastic things...minus the drawers. You could also use PVC pipe to build a simple frame.


I cut my fabric to fit the frame--plus a couple of inches for seam allowance and sliding on and off if needed.


I traced circles onto my main body fabric, showing where I wanted the holes to be.


Folded the material so that the circle was folded in half, and then cut out my circles...I cut a little bigger than my drawn lines.


Next, I cut 4 inch strips to make "bias" tape from...though I didn't cut on the bias.


Next, using your "hole circle" as a guide, cut four circles the size you want to cover the hole with (the door)...I made mine about an inch larger all the way around.


Cut your batting to match the "door" size.


Sandwich your batting between the front and back pieces of your door, and pin in place.


Sew a two short tubes for handles.


And stuff with the scrap pieces you cut off (or use poly-fil).


Quilt your batting and door covers in place.


Attach handles.


Iron bias tape pieces.


Make bias tape.


You will want four pieces of bias tape, one for each hole, and one for each door.


Pin bias tape in place,


And sew it to your hole.


Sew bias tape around your door as well.


Add the hinge to your door,


and attach to the face of your washer/dryer combo. (I mounted my doors to where they would close by gravity and I would not have to have velcro or anything to hold them closed, but it could be done either way.

Next, sew the other three sides on, creating a tube, and sew a square on for the top.


Here is what the finished product looked like. She absolutely loved it! I think in retrospect I would use a PVC pipe frame so that I could make it the size I wanted, but it worked very well this way, and I recycled my plastic thing with missing drawers.

I would love to know if you tried this tutorial, and how it worked out for you. (I assumed in the tutorial basic sewing skills...if you have any questions, feel free to ask).


Check out my link party page to see where I am linking.

Thursday, October 31, 2013

Ariel Dress Tutorial


Now that Halloween is over with, maybe I can get this post finished. A week or so ago I posted a teaser pic of Munchkin in her Ariel Costume, and promised a tutorial, so here it is.


I started with an extra large pink t-shirt and half of a twin sized (I think) sheet.


 The t-shirt got pinned and sewn together in the front and back (this t-shirt had a logo on it which meant I didn't get to choose where to sew to take the body of the dress in some.)


(She is wearing pink long-sleeves under the t-shirt).


 I didn't really take pictures of the skirt-making process, but essentially, I just added a piece of elastic in  the center (long-wise) of a piece of sheet, so that an equal amount hangs on the inside and outside...I did this both to make the skirt a little fuller and to help with the sheer aspect. I actually also sewed a tube into the middle of the skirt that you could stuff with Wal-Mart bags or something to give the skirt even more fullness.


Here, you can see that the skirt is actually separate from the top. I chose to make it this way so we could change things up some if we wanted to, and she could wear the skirt with something else.

I also put elastic in the sleeves...I was in a hurry, so I cheated a bit. I just cut a slit in the sleeve hem and threaded elastic through, then cut another slit (because of the seam) and sewed the ends together. So, if you turn the sleeve inside out, you can see part of the elastic, but I am not worried about that for a costume. If this was for daily wear, I would have done the elastic properly just for comfort.


To ruffle the front of the t-shirt, I just accordian-folded the fabric in the middle until it was the right length and put a few stitches to hold it in place, which allowed the edges to drape down nicely like Ariel's dress does.

Here she is after we sprayed her hair with red hairspray. This was after the party, so the hairspray is already wearing off.

And a beautiful Ariel pose for the camera!
And there you have it!  I'm sorry I didn't take more step-by-step pictures. Unfortunately, with a 2-month old, I was interrupted often and forgot that I hadn't already taken pictures of the step I was on. Let me know if anything is unclear, and I will do my best to clear it up. Thanks for stopping by!


Check out my link party page to see where I am linking.

Sunday, October 27, 2013

Scavenger Hunt Sunday Oct. 27, 2013

I am just joining the scavenger hunt, so some of my pictures I will admit are not from the last week, but I will try to do better next week. Here are my interpretations for this week.

 Change

This is a t-shirt and old sheet I turned into an Ariel dress for Munchkin. (Tutorial coming soon!)


My Mood Today


Youngest midget snoozes away on home-school field-trip.


Dark


It was getting dark when I took this picture after the cannons fired during Civil War Days at 
Columbus-Belmont State Park.


Welcome


When youngest midget was welcomed into the world in August. (Also, credit for this picture goes to my Mom, I was not in a picture taking mood at that point).


 Depth of Field


Taken from my viewpoint on the Nina reproduction ship, looking towards the Pinta reproduction. 
(Home-school field-trip).

 I hope you all enjoyed my photographic interpretations. I will try to do better this week at taking them during the week.


Check out my Link Parties page for a list of all the parties I link to each week.


Saturday, October 26, 2013

DIY: Star Wars Baby Wicket Ewok Costume


Buying a costume for a baby can be very frustrating...you have to consider many things:
  1. Will they keep it on?
  2. Will it irritate their skin?
  3. Will it fit in their carseat safely?
  4. Will it be warm enough or cool enough for the weather?
  5. Does it look adorable?
  6. Can I afford to spend $$$?
Making this one myself, from things we already owned and he had already worn answered most of the above questions for me. Scroll down for the "tutorial."


I hesitate to call this a tutorial because, well, there isn't much to it, and I didn't take step-by-step pictures, but here it is anyway! First, I found brown pants and long-sleeved onesie...I had to turn the pants inside out because the feet had monkeys on them (hubby complained you could see the pants tag, but I was carrying him anyway, so it wouldn't show...otherwise it could be cut out). The onesie actually had a picture on it also, but it was (mostly) covered by the hood (you can see just a smidge of it in the pic above--again, if I had been worried about this, I could have used a safety pin or double-sided tape to keep the hood taped down). Then I found another onesie in red that would fit comfortably as a hood and turned it inside out so the picture on it wouldn't show and put it over his head, making sure the sleeves were tucked in. The tag is printed on that onesie, so it does show, but didn't bother me...I later realized that if I had put the tag under his chin, it probably wouldn't have shown at all. I also originally had planned to sew (or pin) on some fuzzy ears, but that didn't happen either. After all, he is 2 months old...he was clean, dry, warm enough, not too warm, and completely adorable...what more can you ask...?


Check out my Link Parties page for a list of all the parties I link to each week.

Sunday, May 15, 2011

Noah's Birthday Gift

In my (extended) family, there are six birthdays in the month of May. Needless to say, May can be an expensive month if I attend every party (usually at a pizza place with games--more money), and purchase a present for everyone. This idea was born from having no wrapping paper for my nephew, Damon's gift. He had been sent a gift by a far away great great aunt, and it was my job to wrap it...with no wrapping paper. I had purchased a small gift that went along with hers, so I decided to put them all in one big bag. I found an old t-shirt and set to work making a bag out of it...then I thought, why not put his name on it and add a drawstring and it can be a present too!

Apparently the idea was a hit, because his cousin is now asking for one as well. The cousin's party is tonight and I had a little more warning, so I was able to plan his bag a little better. Here is what I came up with.

Ok, turn your head 90 degrees to the left--I really have to remember to turn these right side up next time.


I really like the way this turned out, and I wish that I had the time to plan out Damon's bag because I am afraid he will be a bit jealous now.

Here is a sneak peek at another project I am working on.

Tattered quilt.

This quilt was made by my grandmother. She passed away a couple of years ago, and my Dad gave the quilt to me to be used as batting for another quilt or something, but I know he would rather see it salvaged. Some of the blocks are beyond repair, but a few I was able to salvage and will be able to patch, but the batting is almost non-existent, and there is still much to be done. (It won't be the same quilt when I am finished, but will still showcase some of my grandmother's blocks). Stay tuned for the reveal!

Monday, May 9, 2011

My first tutorial! T-shirt dress

Today, I met my inner Marissa Lynch (of New Dress a Day fame). I decided to remake a couple of too-small garments belonging to my daughter. Read on to see what I came up with! I have never before written a full tutorial so this will probably be a little choppy, but here goes. My daughter had this dress which was way too short on her and getting too tight in the arms, but she really loved it and it was super comfy because it's made from t-shirt material...add to that, she had a shirt which she loved which was getting too tight all around...the colors coordinated pretty well so I decided to see what I could do to put the two together and come up with a wearable item--hopefully.

See the belly sticking out?

Too short and arms too tight.

First, I cut off the dress just below the waistline (this had a high waist or I would have cut above the waistline to make the finished product plenty long).

Off come the sleeves--since they are too tight anyway.

Snagged a little more of the dress material to sew into the sides of the shirt so the finished dress would not be too tight.

Cutting seams out of the sides of the shirt.

Pinning the pieces from the dress into the sides of shirt (these were a little long...I trimmed them later).

I took the original sleeves of the dress and created a little cap sleeve ruffle with them. I was afraid this part would not turn out well at all, but I liked it when I was finished.

Sewing on the cap sleeve.

Sewing down the sides.

Sewing the shirt and skirt together. (just turn one or the other inside out, and put the other piece right side out inside of the inside out piece--adding gathers where needed to make them fit together right--and sew together, then turn right side out.) I also added a neck ruffle and trim, but forgot to take pictures of the process.

Finished product! The ruffles look a bit off to me, and I wound up trimming a bit more off her sleeve ruffles after this picture was taken, but you can see--she loves it!

Not sure why she is winking, but I thought it was cute, and you can see a bit more of the pieces I added in on the sides.

Well, there it is, my first tutorial. Hope I didn't butcher too badly what I was trying to say/show. If you have any questions, please feel free to ask, and thanks for coming along for the (bumpy) ride today! (Also, check back often as I am planning to attempt to make 3 items per week and blog about each--totally wish I had time for a project a day...just not happening right now lol!)

Here are the places I am linking up today:


Make it Yours @ My Backyard Eden