Showing posts with label upcycle. Show all posts

Friday, November 8, 2013

Stacked Washer & Dryer Tutorial


I made this a few years ago, but am just now getting around to posting the tutorial. My daughter had one of those plastic washer/dryer things to play with, but it was not functional and took up a lot of room. I created this one with the intention of using it as a laundry basket as well. You could put a mesh bag on the inside for laundry if you chose to use it that way.
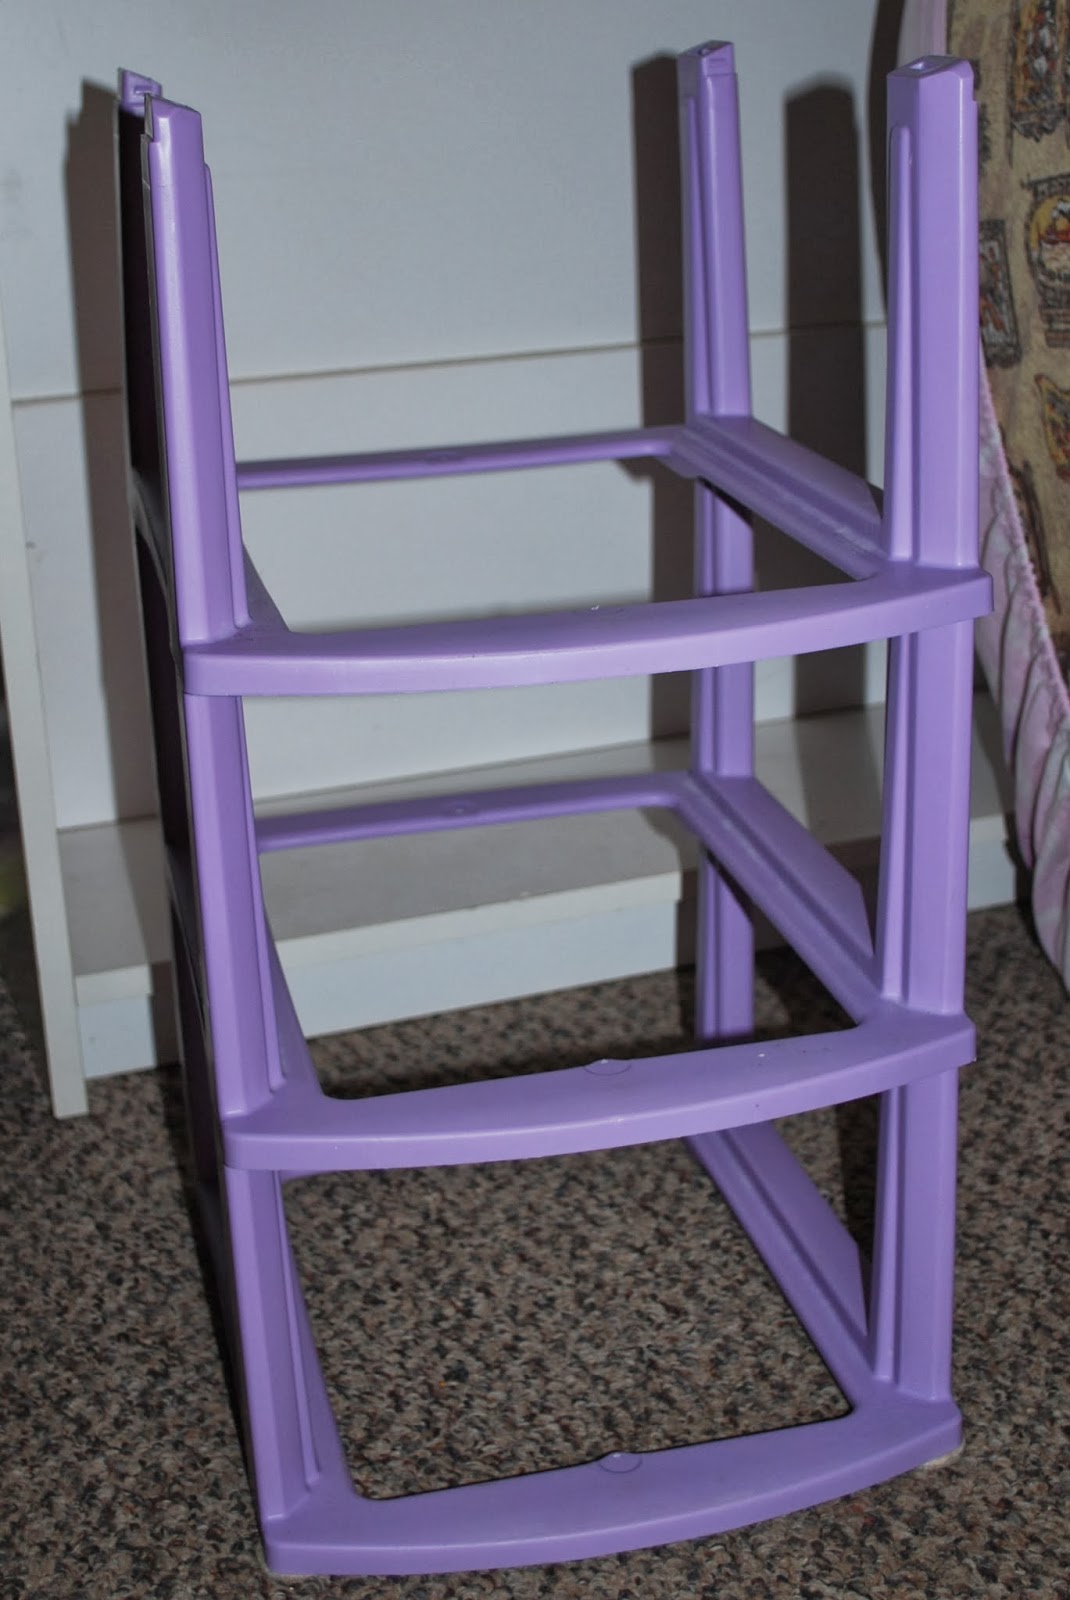

I started with this...one of those 3-drawer plastic things...minus the drawers. You could also use PVC pipe to build a simple frame.


I cut my fabric to fit the frame--plus a couple of inches for seam allowance and sliding on and off if needed.


I traced circles onto my main body fabric, showing where I wanted the holes to be.


Folded the material so that the circle was folded in half, and then cut out my circles...I cut a little bigger than my drawn lines.


Next, I cut 4 inch strips to make "bias" tape from...though I didn't cut on the bias.


Next, using your "hole circle" as a guide, cut four circles the size you want to cover the hole with (the door)...I made mine about an inch larger all the way around.


Cut your batting to match the "door" size.


Sandwich your batting between the front and back pieces of your door, and pin in place.


Sew a two short tubes for handles.


And stuff with the scrap pieces you cut off (or use poly-fil).


Quilt your batting and door covers in place.


Attach handles.


Iron bias tape pieces.


Make bias tape.


You will want four pieces of bias tape, one for each hole, and one for each door.


Pin bias tape in place,


And sew it to your hole.


Sew bias tape around your door as well.


Add the hinge to your door,


and attach to the face of your washer/dryer combo. (I mounted my doors to where they would close by gravity and I would not have to have velcro or anything to hold them closed, but it could be done either way.

Next, sew the other three sides on, creating a tube, and sew a square on for the top.


Here is what the finished product looked like. She absolutely loved it! I think in retrospect I would use a PVC pipe frame so that I could make it the size I wanted, but it worked very well this way, and I recycled my plastic thing with missing drawers.

I would love to know if you tried this tutorial, and how it worked out for you. (I assumed in the tutorial basic sewing skills...if you have any questions, feel free to ask).


Check out my link party page to see where I am linking.

Saturday, October 26, 2013

DIY: Star Wars Baby Wicket Ewok Costume


Buying a costume for a baby can be very frustrating...you have to consider many things:
  1. Will they keep it on?
  2. Will it irritate their skin?
  3. Will it fit in their carseat safely?
  4. Will it be warm enough or cool enough for the weather?
  5. Does it look adorable?
  6. Can I afford to spend $$$?
Making this one myself, from things we already owned and he had already worn answered most of the above questions for me. Scroll down for the "tutorial."


I hesitate to call this a tutorial because, well, there isn't much to it, and I didn't take step-by-step pictures, but here it is anyway! First, I found brown pants and long-sleeved onesie...I had to turn the pants inside out because the feet had monkeys on them (hubby complained you could see the pants tag, but I was carrying him anyway, so it wouldn't show...otherwise it could be cut out). The onesie actually had a picture on it also, but it was (mostly) covered by the hood (you can see just a smidge of it in the pic above--again, if I had been worried about this, I could have used a safety pin or double-sided tape to keep the hood taped down). Then I found another onesie in red that would fit comfortably as a hood and turned it inside out so the picture on it wouldn't show and put it over his head, making sure the sleeves were tucked in. The tag is printed on that onesie, so it does show, but didn't bother me...I later realized that if I had put the tag under his chin, it probably wouldn't have shown at all. I also originally had planned to sew (or pin) on some fuzzy ears, but that didn't happen either. After all, he is 2 months old...he was clean, dry, warm enough, not too warm, and completely adorable...what more can you ask...?


Check out my Link Parties page for a list of all the parties I link to each week.

Monday, May 9, 2011

My first tutorial! T-shirt dress

Today, I met my inner Marissa Lynch (of New Dress a Day fame). I decided to remake a couple of too-small garments belonging to my daughter. Read on to see what I came up with! I have never before written a full tutorial so this will probably be a little choppy, but here goes. My daughter had this dress which was way too short on her and getting too tight in the arms, but she really loved it and it was super comfy because it's made from t-shirt material...add to that, she had a shirt which she loved which was getting too tight all around...the colors coordinated pretty well so I decided to see what I could do to put the two together and come up with a wearable item--hopefully.

See the belly sticking out?

Too short and arms too tight.

First, I cut off the dress just below the waistline (this had a high waist or I would have cut above the waistline to make the finished product plenty long).

Off come the sleeves--since they are too tight anyway.

Snagged a little more of the dress material to sew into the sides of the shirt so the finished dress would not be too tight.

Cutting seams out of the sides of the shirt.

Pinning the pieces from the dress into the sides of shirt (these were a little long...I trimmed them later).

I took the original sleeves of the dress and created a little cap sleeve ruffle with them. I was afraid this part would not turn out well at all, but I liked it when I was finished.

Sewing on the cap sleeve.

Sewing down the sides.

Sewing the shirt and skirt together. (just turn one or the other inside out, and put the other piece right side out inside of the inside out piece--adding gathers where needed to make them fit together right--and sew together, then turn right side out.) I also added a neck ruffle and trim, but forgot to take pictures of the process.

Finished product! The ruffles look a bit off to me, and I wound up trimming a bit more off her sleeve ruffles after this picture was taken, but you can see--she loves it!

Not sure why she is winking, but I thought it was cute, and you can see a bit more of the pieces I added in on the sides.

Well, there it is, my first tutorial. Hope I didn't butcher too badly what I was trying to say/show. If you have any questions, please feel free to ask, and thanks for coming along for the (bumpy) ride today! (Also, check back often as I am planning to attempt to make 3 items per week and blog about each--totally wish I had time for a project a day...just not happening right now lol!)

Here are the places I am linking up today:


Make it Yours @ My Backyard Eden


Sunday, May 8, 2011

Finally SUMMER!

A couple of days ago I made a new item. I totally planned to blog about it right after I finished, but hmm, I don't know what happened...I think the summer lazies caught up with me. So anyway, I bought a big bag of material for $5 and in the bottom was some old upholstery samples...I decided to see what I could come up with that just used one sample instead of sewing them all together and making something. So, here is my before picture of what I started out with.


Zipper from the pants, two scraps from the bag I bought, and the upholstery sample.

I had also just purchased a zipper foot (finally!) for my sewing machine so I decided to test it out. Now I wish I had taken step by step pictures because at a couple of points I wasn't quite sure if it was going to turn out right or not. Here is the finished project (a change purse).


I also just created an Etsy shop this week, so the change purse and several of my other creations are available for purchase on Etsy at  http://www.etsy.com/shop/ScrappyBag?ref=pr_shop_more. Or you can search for ScrappyBag on Etsy.com.

Monday, October 4, 2010

Sunday's Post

Well, Sunday I couldn't get my computer to upload pictures to my blog, so here is Sunday's post...a day late.

At about 1:00am (Saturday night/Sunday morning) I finally finished the rug I have been working on intermittently for the last couple weeks. I think it turned out nice, but different from my original vision. The coolest thing about this rug is that it was truly made from scraps with the exception of the dark pink...that was a pair of scrub bottoms. The rest was all pieces that were less than 1 square foot, and most were actually odd triangle pieces or trimmings that I could only get one or two strips from, so the prep work took a bit longer on this one...but  it is more recycled too, because most of the pieces were too small for much else. I'll be looking to start another project tonight or tomorrow...hopefully a simple one so I can finish it in one day and feel like I've accomplished something. Well, here is a picture of my rug, and a one of our ride today.

My wonderful rug!

Getting ready to ride out.

It was pretty cold starting out and I couldn't find anyone to watch Munckin, so I wound up driving the van instead of riding my bike or riding with hubby. It was still a fun trip, but the directions and map were absolutely attrocious! 

Sunday, September 19, 2010

Project Pictures

I finally got some pictures to upload, so I am going to try to post pictures I promised last week of some of my projects. These projects are all made from recycled materials.

Rag Rug that I finished a few days ago. It measures about 21 inches.
Closeup

New rug I am working on.

Aly's Dora handbag...made from shorts (and a shirt).

Pocket.
Inside pockets...mismatched socks.

Cute handbag-Recycled placemat, mens shirt, button, scrap quilt material.

Liner is a recycled pillowcase, pockets made from the mens shirt.
Cloth napkins. Purchased fabric remnant with chickens, reverse side from mens shirt.
Purse crocheted with T-yarn.

Crocheted plarn purse.

I'm so happy to finally be able to upload these pics! Now I just need to get started on some new projects...right after I finish my homework lol. 

http://www.castleink.com/  (this link is for a scholarship I am applying for--feel free to check them out!)